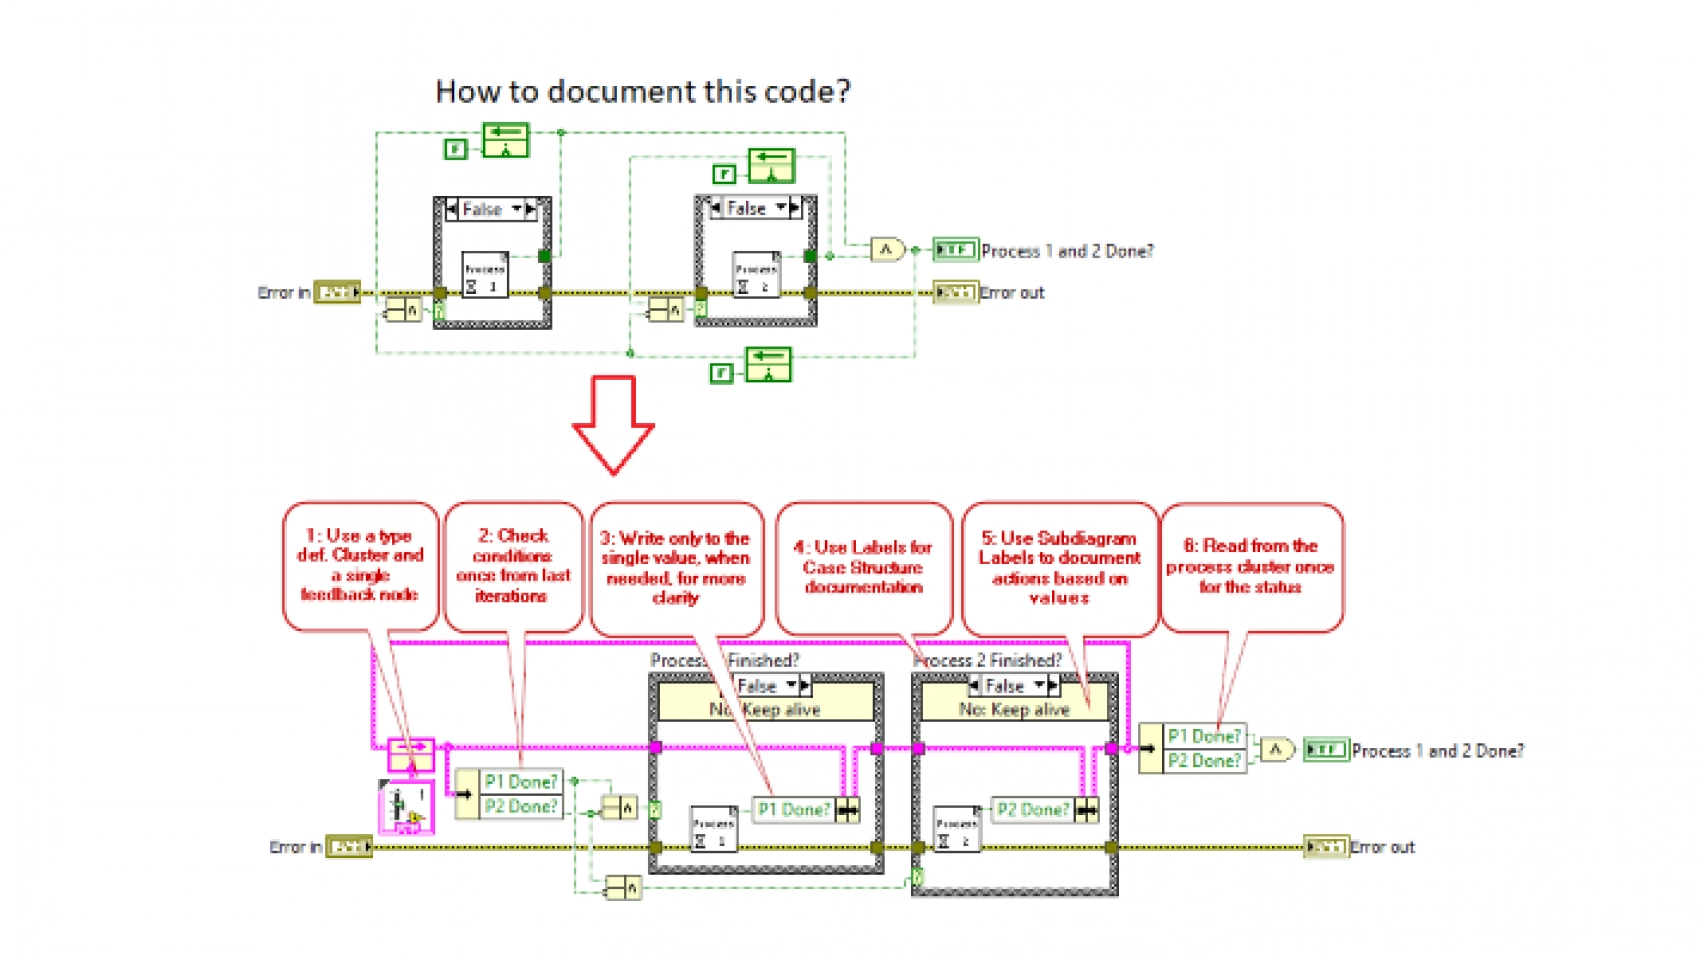
Use a type def. cluster and a single feedback node, check conditions once from last iteration, and write only to the single value, when needed, for more clarity. Read the blog post to get more tips in terms of documentation in LabVIEW.
At some point, everyone has definitely come across a sample of undocumented code, as the one presented in the top of the image, and asked oneself questions such as:
- Why is this code written?
- What are the conditions for execution?
- Why is the condition for the case structures dependent on the VI output?
- Why is this output inverted?
The above-mentioned questions could, however, have been avoided by doing a small effort to document the code by using the built-in tools in LabVIEW.
On the lower part of the image, I have shown some bullets on how to document a VI using the simplest tool in LabVIEW. I have used the type defined Cluster datatype along with a feedback node to handle the data in each iteration, as these give good documentation of the available data. Furthermore, by adding labels and sub-diagram labels for the case structures, the understanding of when to perform the processes is much clearer.
An important point to mention here is that these tools are available in all versions of LabVIEW.
Start documenting your code today!
By writing this post, my intention was to stress the importance of documentation for the purpose of reducing the complexity for the reader and reducing bugs in the code in future.